An easy Gauge-1 beginner's scratchbuilding project
In the days before electricity was common, many industries were powered by steam. A large steam engine drove a long lineshaft to which the various machines were connected and driven by leather belts. Quite often, for safety reasons, the boiler that powered the steam engine was housed in a separate building from everything else. Most large industrial boiler or power houses were made of substantial brick, with a large brick chimney.

However, there were also thousands upon thousands of smaller ones across the country housed in wooden structures as well. They could be supplying steam for local machine shops, water, oil and gas wells, small foundries, mines, sawmills, etc..... Our model will be of this simpler kind; a basic wooden shed with a large metal smokestack.
If you've ever built a birdhouse, you have all the basic skills needed to complete this project.
I used the following materials:
One 2' x 2' piece of used 1/4" plywood
One 5" x 16" piece of used 1/8" plywood
One 2" x 6" piece of used acrylic sheet
One plastic window from a building kit
1/4" tubing
One Ozark Miniatures Whistle casting (optional)
Small finishing nails
Various bits of scrap lumber
A handful of wooden coffee stirrers
Contact Adhesive
One 5" x 16" piece of used 1/8" plywood
One 2" x 6" piece of used acrylic sheet
One plastic window from a building kit
1/4" tubing
One Ozark Miniatures Whistle casting (optional)
Small finishing nails
Various bits of scrap lumber
A handful of wooden coffee stirrers
Contact Adhesive
The basic building is made of 6 simple pieces: 2 end walls, 2 side walls, 2 roof pieces. Since each pair is identical, you only need to draw 3 patterns. 2 different sized rectangles, and a gable end. The really nice thing about this project is you can make it just about any size you want. I made mine 6" wide by 8" long, by 9" tall. A relatively tiny 12 x 16 foot structure in 1:24, but adequate for my needs.
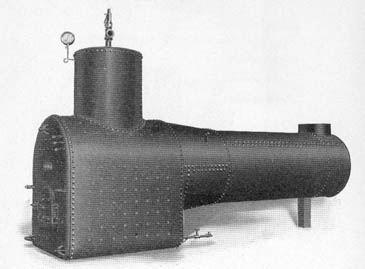
Just for reference, this is the kind of boiler you'd probably find in a powerhouse of this size. A simple hand fired locomotive style, usually set on a brick foundation. To keep everything dead simple, we'll be following this philosophy: If it doesn't show, we aren't going to bother to model it!
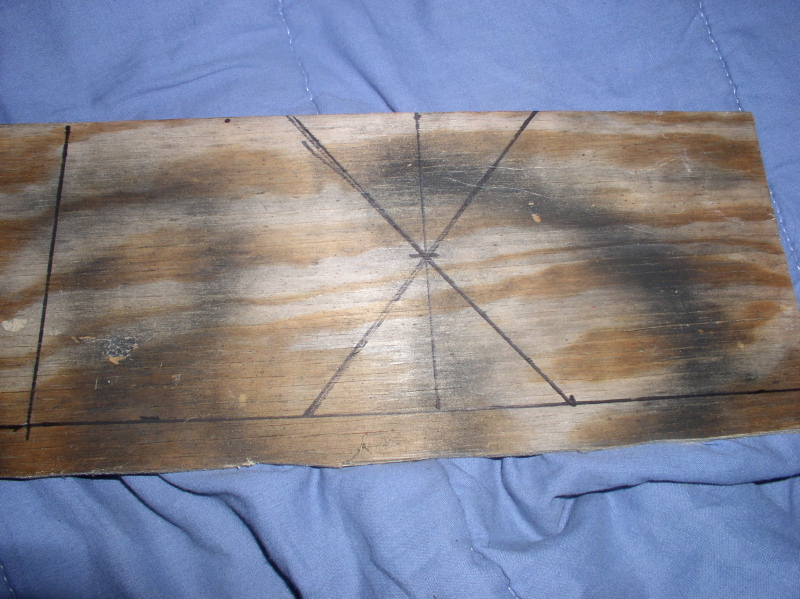
First project will be to lay out your two gable ends. These are just a basic rectangle with a triangle on top.... A ruler, a carpenter's square and a marker or pencil is all you need.... To make things easier, the wood grain showing should run the same way as the grain would on a real building. In this case, vertical for board and batten.
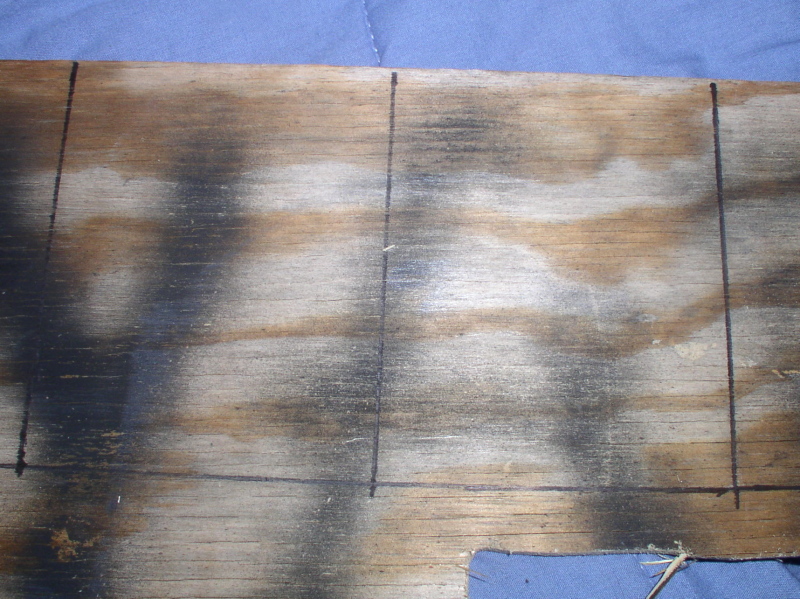
Next, lay out your two sides, they're just rectangles. Their height should be the same height as the vertical part on the gable ends. The length is the building length, minus the thickness of the two ends. Don't forget about the grain again!
Cut them out using a handsaw, table saw, bandsaw, scroll saw - or whatever method you're comfortable using. Then sand the pairs to match.
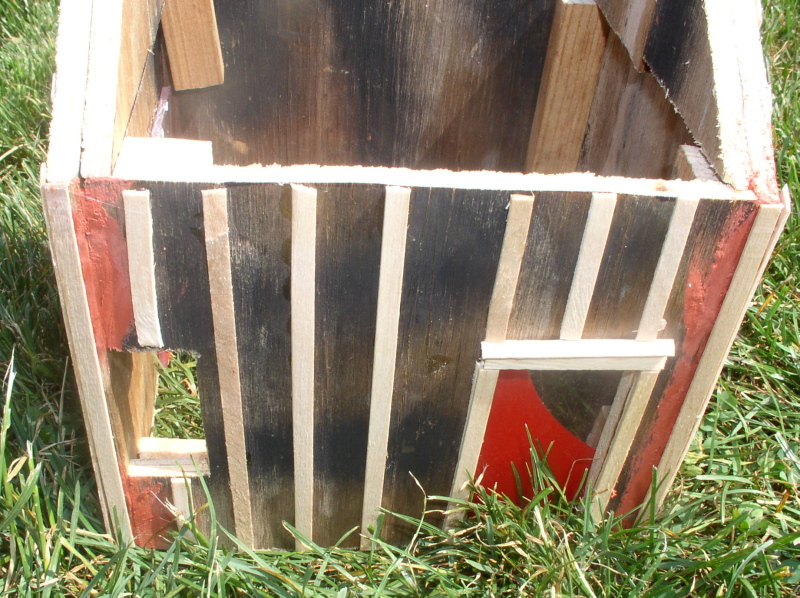
Next, lay out and cut any door or window openings you want in your building. Many boiler houses also had a man door or barn door at one end to make cleaning the boiler tubes easier. This view shows my front door and a window. I glued coffee stirrers to the plywood to look like board and batten construction, as well as to frame the doorway. These cut easily with sprue nippers and add 3 dimesional texture without much effort. Spot putty was used to fill in the seams between the ends and sides. The door is just a bit of acrylic sheet glued to the inside of the wall. A small bead will be added for a door knob... eventually.
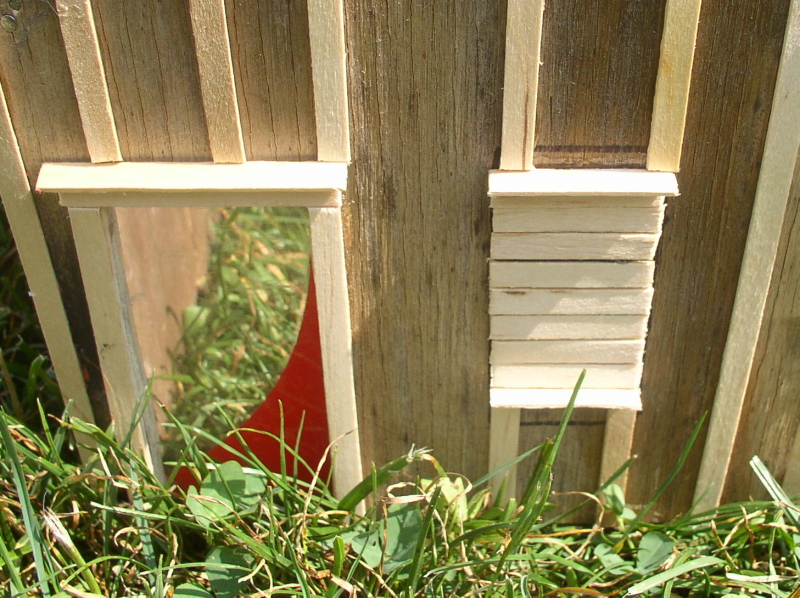
The end door for boiler cleaning, and a boarded up window. Boarded windows are very easy to model. No need to cut a hole, you simply cut short bits of coffee stirrer and glue them on where the window never was.
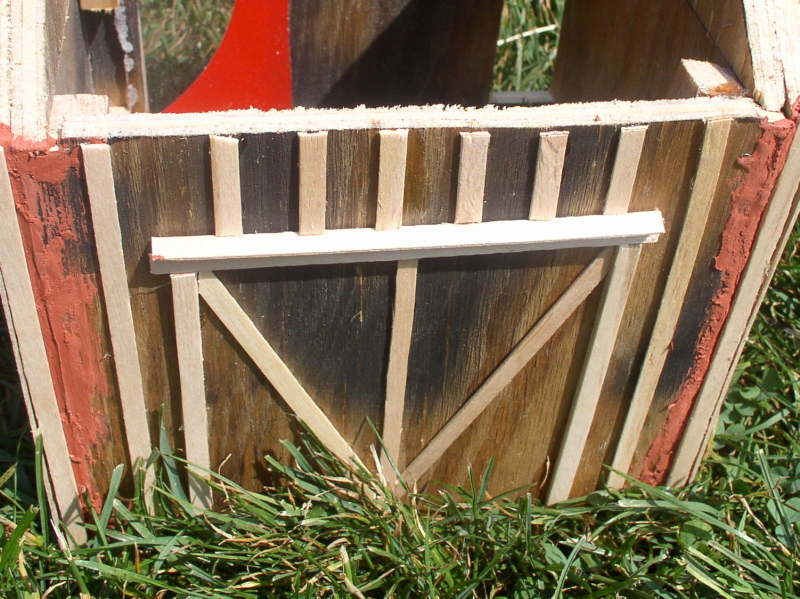
This view shows how to make a basic 'barn' door. Again, it is just framed with coffee stirrers, since it doesnt open, there's no cutting required!
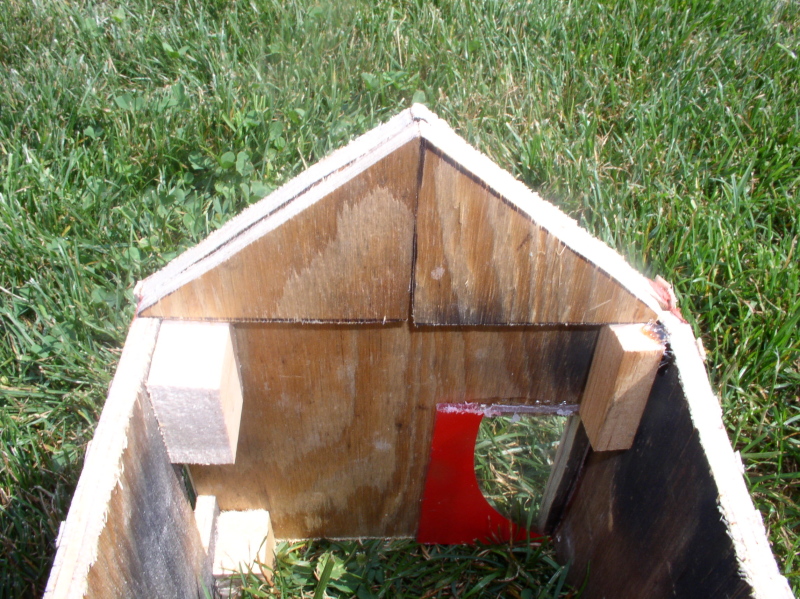
This picture shows the inside of the gable end. Here you can see the blocks of scrap wood I used to reinforce the corners, and the leftover bits from cutting the gables used to make a wider area for the glue to hold the roof on. Small finishing nails were driven through the walls and into the reinforcing blocks to help hold everything together while the glue dries and to provide the extra strength of a mechanical connection. Remember! The straighter you cut, the neater it looks, but if it's a little rough (like this), that's still OK, too. You can always file or sand it straighter, or use putty to seal the gaps.
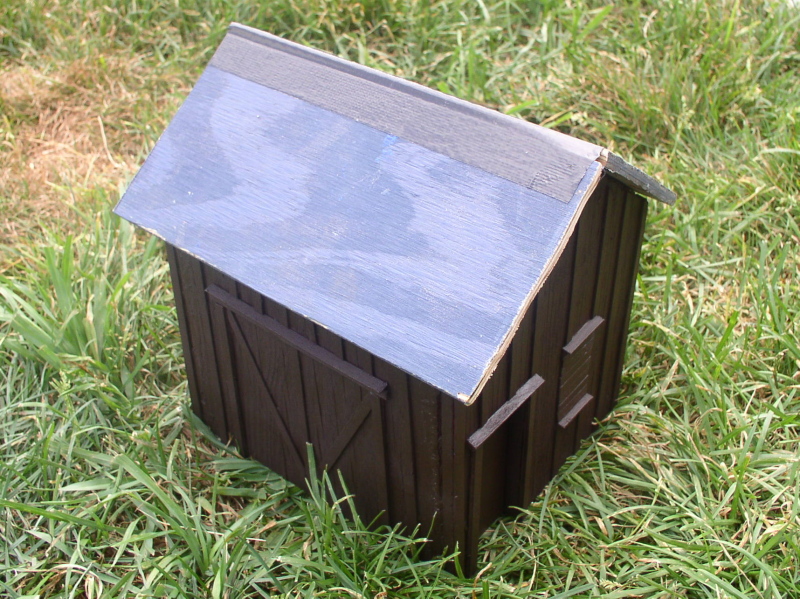
Once the walls are assembled you can paint them. Leave them natural, coat them with used motor oil... whatever you like. I used Krylon Camoflage Ultra Flat Dark Brown simply because it was already here.
I cut the roof from 1/8" plywood, because it looks more to scale. You want to have a little bit of overhang all around (at least 1/2"). And here's a quick and easy tip to seal the peak.... good old duct tape. One strip on the underside, one on top. It holds everything in place while the glue dries too! Simple tarpaper roofs were usually grey, green or black. Metal roofs could be about any color, including rust - or even multicolor if the owner bought used bits. I have some Flat Black in a rattle can, so I'll use that.
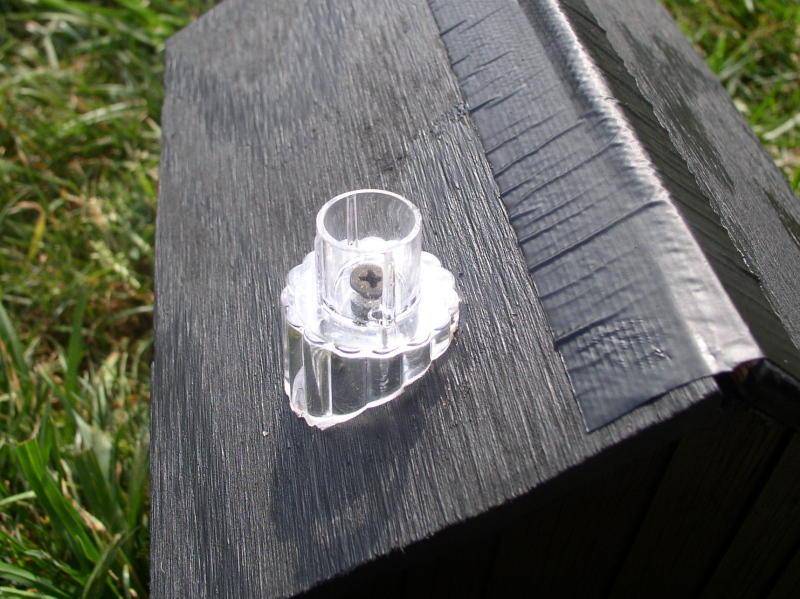
To make the smokestack, I used the stake and lens from a solar garden light. If you don't have one, you can just use PVC if you want, and simply add a square of 'tin' (acrylic) under the base where it meets the roof . The garden light is available at Wal-Mart for about $3, and is nice because you can cut the lens part the same angle as the roof and mount it firmly with a single screw.
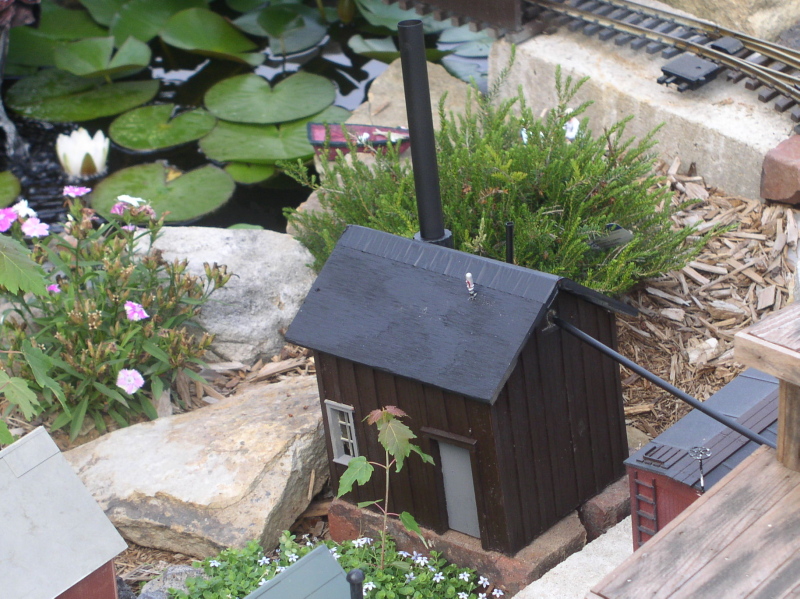
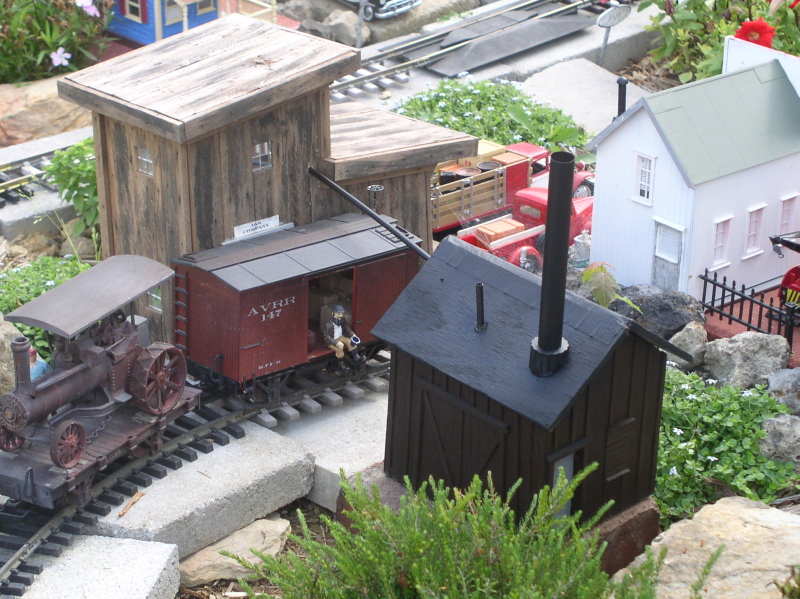
Chimney installed, painted, whistle and vent for the safety valve added, and the boilerhouse temporarily set in place on my layout. It looks like it belongs there, so I'll probably just level it. Then add a coal bin and some 'clutter'.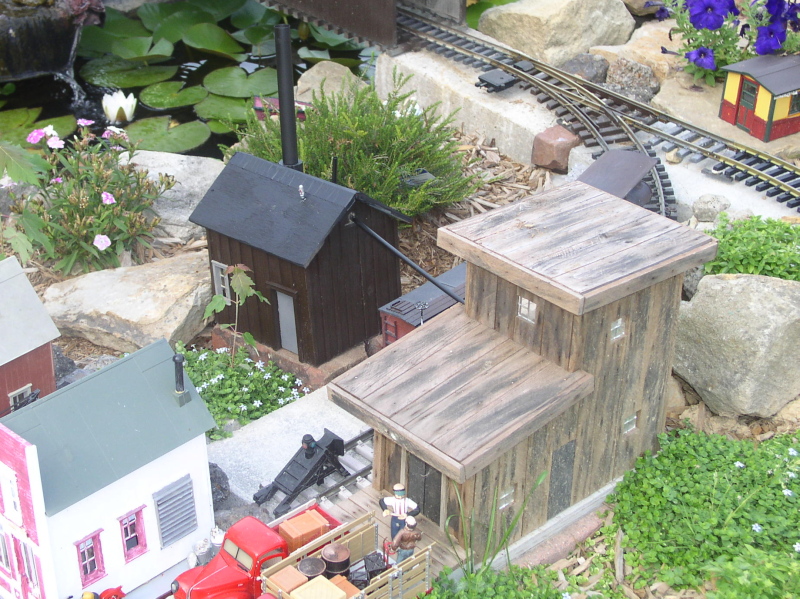
Total build time, about 3-1/2 hours...
To see more of my layout, go here:
The Allegheny Valley Garden RR
This page hosted courtesy of
the-ashpit.com, a web board for broad minded narrow gauge folks
Just for reference, this is the kind of boiler you'd probably find in a powerhouse of this size. A simple hand fired locomotive style, usually set on a brick foundation. To keep everything dead simple, we'll be following this philosophy: If it doesn't show, we aren't going to bother to model it!
First project will be to lay out your two gable ends. These are just a basic rectangle with a triangle on top.... A ruler, a carpenter's square and a marker or pencil is all you need.... To make things easier, the wood grain showing should run the same way as the grain would on a real building. In this case, vertical for board and batten.
Next, lay out your two sides, they're just rectangles. Their height should be the same height as the vertical part on the gable ends. The length is the building length, minus the thickness of the two ends. Don't forget about the grain again!
Cut them out using a handsaw, table saw, bandsaw, scroll saw - or whatever method you're comfortable using. Then sand the pairs to match.
Next, lay out and cut any door or window openings you want in your building. Many boiler houses also had a man door or barn door at one end to make cleaning the boiler tubes easier. This view shows my front door and a window. I glued coffee stirrers to the plywood to look like board and batten construction, as well as to frame the doorway. These cut easily with sprue nippers and add 3 dimesional texture without much effort. Spot putty was used to fill in the seams between the ends and sides. The door is just a bit of acrylic sheet glued to the inside of the wall. A small bead will be added for a door knob... eventually.
The end door for boiler cleaning, and a boarded up window. Boarded windows are very easy to model. No need to cut a hole, you simply cut short bits of coffee stirrer and glue them on where the window never was.
This view shows how to make a basic 'barn' door. Again, it is just framed with coffee stirrers, since it doesnt open, there's no cutting required!
This picture shows the inside of the gable end. Here you can see the blocks of scrap wood I used to reinforce the corners, and the leftover bits from cutting the gables used to make a wider area for the glue to hold the roof on. Small finishing nails were driven through the walls and into the reinforcing blocks to help hold everything together while the glue dries and to provide the extra strength of a mechanical connection. Remember! The straighter you cut, the neater it looks, but if it's a little rough (like this), that's still OK, too. You can always file or sand it straighter, or use putty to seal the gaps.
Once the walls are assembled you can paint them. Leave them natural, coat them with used motor oil... whatever you like. I used Krylon Camoflage Ultra Flat Dark Brown simply because it was already here.
I cut the roof from 1/8" plywood, because it looks more to scale. You want to have a little bit of overhang all around (at least 1/2"). And here's a quick and easy tip to seal the peak.... good old duct tape. One strip on the underside, one on top. It holds everything in place while the glue dries too! Simple tarpaper roofs were usually grey, green or black. Metal roofs could be about any color, including rust - or even multicolor if the owner bought used bits. I have some Flat Black in a rattle can, so I'll use that.
To make the smokestack, I used the stake and lens from a solar garden light. If you don't have one, you can just use PVC if you want, and simply add a square of 'tin' (acrylic) under the base where it meets the roof . The garden light is available at Wal-Mart for about $3, and is nice because you can cut the lens part the same angle as the roof and mount it firmly with a single screw.
Chimney installed, painted, whistle and vent for the safety valve added, and the boilerhouse temporarily set in place on my layout. It looks like it belongs there, so I'll probably just level it. Then add a coal bin and some 'clutter'.
Total build time, about 3-1/2 hours...
To see more of my layout, go here:
The Allegheny Valley Garden RR
This page hosted courtesy of
the-ashpit.com, a web board for broad minded narrow gauge folks