
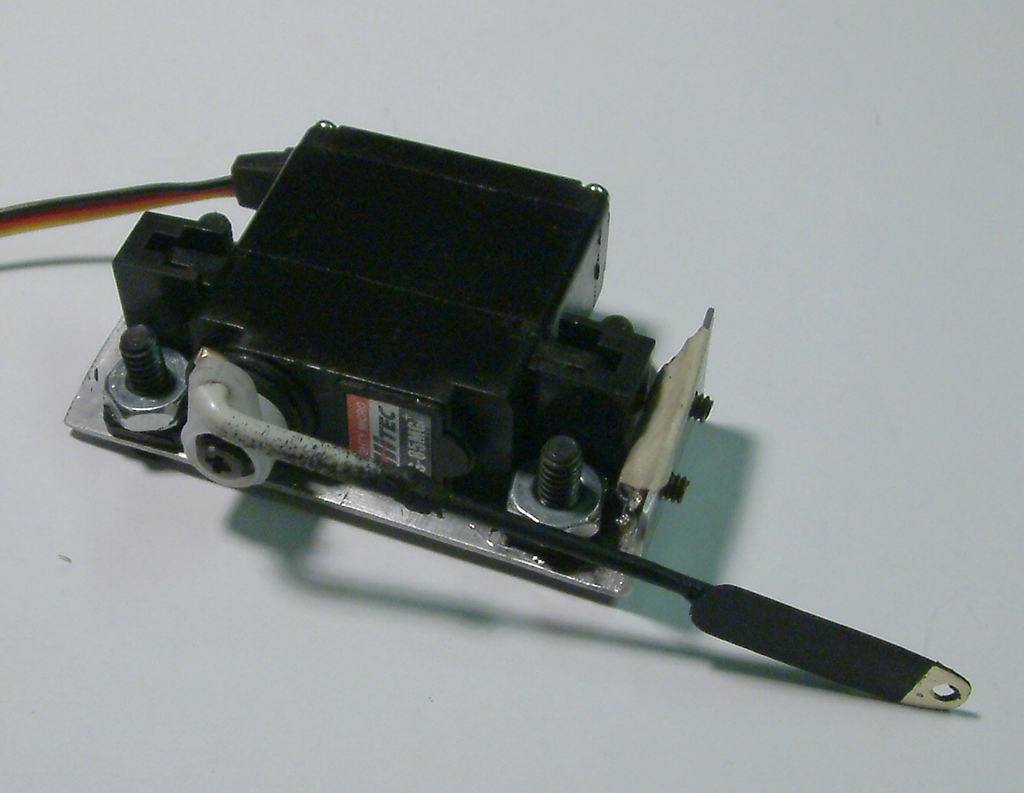
Once the battery box problem was solved, the next challenge was how to mount the servo. My son Matthew is a fan of hot glue but I rejected that suggestion due to the proximity to boiler heat. Because the water tank sits directly on the deck of the Shay, bolting the servo to the tank was not an option as there would be no room for the screw heads. The solution was to fabricate a mounting bracket that would attach to the front on the tank. Using some scrap aluminum this servo bracket was fabricated. [Click to Enlarge]
I didn't want the heads of the rather large bracket mounting screws to show outside the tank. I reasoned that nuts would look acceptable since they scale well, but flat or Phillips head screws that large would look odd. Once the servo was test fitted to this bracket it was obvious that reaching the back side of the mounting screws with any type of tool would be impossible. The solution was to use brass machine screws and solder them together with a terminal jumper. The nuts outside the tank could then be tightened without holding the back side.
With the servo mounting figured out, the last remaining functional part to fabricate was the servo linkage. My original thought was to use small diameter rod, but looking at the original connection of the Johnson Bar lever to the valve, I decided a small piece of flat stock was needed at the connection point. A quick trip to the hobby store for some brass rod and flat stock resulted in the fabrication of this servo link. [Click to Enlarge]

The white covering on the end of the rod is insulation from 14 gauge house wire held in place with a drop of hot glue. It is used to compensate for the over-size bend in the wire keeping the rod tight in the servo horn.
Next the servo link was painted and attached to the servo. The servo was mounted to it's bracket with flat head machine screws. Here you can see the brass studs protruding from the front of the bracket. The masking tape will keep the studs in place until the nuts are attached. [Click to Enlarge]
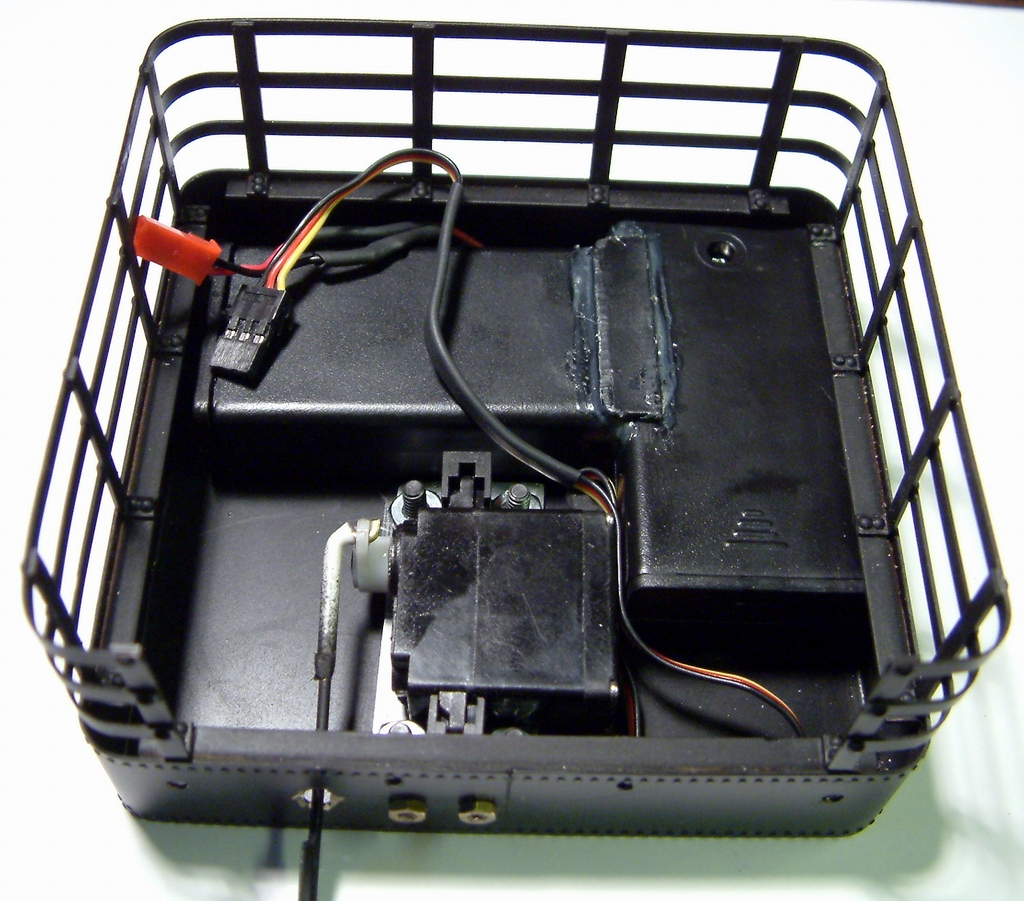
Now the components to be mounted in the tank are ready for final assembly. Here is a shot of the tank with the components assembled before the tank was attached back on the Shay. The battery box just floats; it's weight and shape keep it in place. [Click to Enlarge]
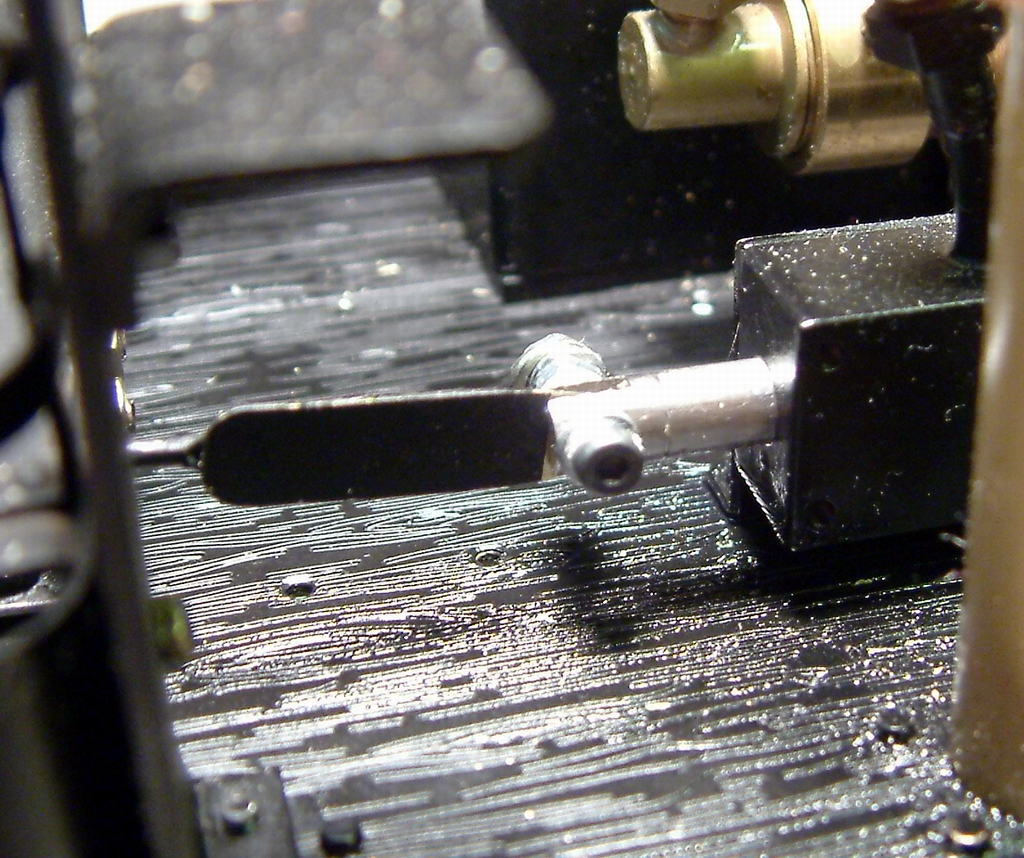
The final step before moving on to the radio is to mount the tank back on the Shay and connect the Johnson Bar to the servo link. I used a 2MM machine screw and two nuts to attach the link to the valve stem. The original brass pin that was in this place was difficult to remove. I wanted a connection that could easily be removed. Here is a close-up of the J-Bar connection. [Click to Enlarge]
Next we'll figure out how to hide the radio receiver and power switch.